Inventory Management Setup and Tracking in QuickBooks Online
Inventory Management Setup and Tracking in QuickBooks Online

The accounting and auditing sector has largely benefitted from tools like QuickBooks Solution as it offers on-premises accounting toolkits as well as cloud-based versions that accept business payments, manage and pay bills, with payroll functions. As QuickBooks is also available with cloud, you never have to worry about your data getting lost. Because it’s not vulnerable to any kind of damage caused on premise. All your data is saved and well protected on cloud. It lets you access it from anywhere, improved accessibility and high fault tolerance.
Anyways, this article is not about how great or efficient QuickBooks is, but it is about setting up and tracking your inventory in QuickBooks online. Tracking your inventory will help you to stay on top of what you have in stock so that you can ensure you can fulfill any pending or upcoming customer orders. It will also help you to determine whether you are making money or losing money on each product (i.e. profit margin) so that you can decide if it’s worth it to continue to sell an item or just drop it from your catalog altogether.
Whether you purchase items that you resell to your customers or make the products that you sell to customers, you should always know what your cost is, what you sell the item for and how much you have on-hand. By tracking inventory in QuickBooks, you can do all of this and much more.
Additionally, Tracking and managing inventory is a tedious task but an important one to ensure you have enough product on hand to keep your customers happy. QuickBooks Pro, Premier and Enterprise editions offer inventory tracking, although the feature is disabled at the time of installation. By enabling and using the inventory tracking functions, you can not only manage inventory, but you can also receive alerts when it's time to reorder and create purchase orders.
The QuickBooks inventory tutorial is simple, and you will be adding products or services almost immediately. However before jumping to the tutorial lets see some benefits of inventory management using QuickBooks online. There are a number of benefits to tracking inventory in QuickBooks. Here are just a few reasons:
QuickBooks will track the cost of each item you have sold (i.e. cost of goods sold).
You can track the sale of each product so that you know which items are flying off the shelves versus the items that are collecting dust.
You can easily check to see what your current on hand quantities are to determine what products you need to place an order with your supplier for.
When you buy and sell products, your inventory quantities are automatically updated, making it easy to see what’s selling and what to reorder.
Inventory values are automatically adjusted in your balance sheet as you go about your day.
Keep track of what you’ve ordered from each vendor. Organize contact information for multiple vendors in one place to make reordering easier.
Now, lets talk about setting up inventory management in QuickBooks Online. Before we can set up our inventory in QuickBooks, we must turn on the inventory tracking feature.
Here are the steps to set up inventory in QuickBooks Online:
Step 1 – Navigate to Company Preferences
From the Gear icon in the upper right corner, select Account and Settings as indicated in the screenshot below.
Step 2 – Navigate to the Sales Tab
On the left-hand menu, click on the Sales tab as indicated in the screenshot below.
Step 3 – Turn on the Inventory Tracking Feature
Click on the pencil icon located in the upper right corner and then select “On” next to “Track inventory quantity on hand” as indicated in the screenshot below. Click the Done button which will be located at the bottom of the screen to save your changes.
Step 4 – Navigate to the Products and Services List
Click on the Gear icon in the upper right corner and select Products and Services directly below the List column as indicated in the screenshot below.
Step 5 – Create a New Inventory Item in QuickBooks
Click on the “New” button as indicated in the screenshot below.
Step 6 – Select the Item Type
In the next screen, you should see the type of items that you can set up. For the purposes of this article, we will focus on the Inventory item type
Step 7 – Enter the Information for the New Item
- Name – This is a required field. Enter the name of the item in this field. This field is for your internal purposes only; you will have a chance to enter a different name/description for customers and suppliers.
- Picture – This is an optional field Upload a picture of the item in this field if appropriate.
- SKU – This is an optional field. Enter the SKU for the item in this field, if applicable. An SKU is a unique number that is used to identify a product.
- Category – You can group similar products and services by setting up categories.
- Initial quantity on hand – This is a required field. Be sure that you have an accurate inventory count of each item before you set it up in QuickBooks. Once you save and close out of this screen the quantity field will be grayed out and you will have to enter an inventory adjustment to update the quantity.
- As of date – This is a required field. Enter the date that you want to start tracking this item’s quantity on hand.
- Reorder point – This is an optional field. Enter the minimum quantity that you want to have onhand. Once you reach this quantity, QuickBooks will send you a notification that it is time to reorder this item.
- Inventory asset account – This is a required field. It is automatically populated by QuickBooks. However, if you would like to track your inventory using a different account, you can do so.
- Sales Information – In this field, enter the description that you would like to appear on invoices and sales receipts that you send to your customers.
- Sales price/rate – Enter the price that you sell the item for in this field. If your sales price varies with each customer, you can leave this field blank and fill it out directly on the customer invoice/sales receipt.
- Income account – This is a required field. Enter the account that you would like to use to track all sales for this item.
- Purchasing information – This field is only required if you plan to create purchase orders; otherwise you can leave it blank. Enter the description that you would like to appear on purchase orders.
- Cost – Enter that amount that you paid for the item. This field is optional but I recommend that you complete it so that QuickBooks can track your cost of goods sold.
- Expense account – This is a required field. It is automatically populated by QuickBooks. It is the account that will be used to track the cost of items once you have sold them (i.e. cost of goods sold). You can click on the dropdown to select a different account to track your costs or setup a new one.
Step 8 – Review List of Products & Services Report
Once you have set up all of your inventory items, you can easily run a Products/Service list report in QuickBooks.
There are other several benefits of setting up Inventory in QuickBooks. Lets see them:
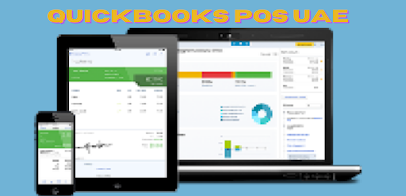
Manage your business on the go
Access your account, manage your business, and stay organized on your computer, mobile phone, or tablet.
Track your expenses
Record expenses for tax time. You can even photograph and save receipts with the QuickBooks Online mobile app.
Create and send business forms
Create custom, professional invoices, sales receipts and estimates that you can send in minutes.
Know where your business stands
Instantly see how your business is performing with customizable reports and dashboards.
Take control of your cash flow
Enter bills from vendors,and pay them only when they are due. Schedule recurring payments to save time.
Free unlimited support
If you need help, support is available with answers to your questions and information on running your business.
So, inventory management is really important for you business which will increase the efficacy of your business. We hope this article will help you in understanding and setting it up.

Comments
Post a Comment